Crochet your own Shiny Charm from Pokémon!
Table of Contents
- Introduction
- Materials Needed
- Crocheting the Charm
- 3.1 Creating the Slip Knot
- 3.2 Making the Initial Chain
- 3.3 Single Crocheting the Rows
- 3.4 Joining the Squares
- 3.5 Adding the Border
- 3.6 Creating the Tassels
- 3.7 Attaching the Beads
- 3.8 Finishing Touches
- Conclusion
How to Crochet a Shiny Charm from Pokemon
Crocheting is a creative and relaxing hobby that allows you to make beautiful creations with just a hook and some yarn. In this tutorial, I will guide you step by step on how to crochet a shiny charm from Pokemon. This adorable accessory can be used as a keychain, a bag charm, or even a decoration for your room. So grab your materials and let's get started!
Materials Needed
Before we begin, let's gather all the materials you will need for this project. Here's a list:
- 3mm (or 4mm) crochet hook
- Yarn needle
- Bright green pony beads
- Scissors
- Yarn in pale blue, darker shade of blue, and very dark blue
You can choose any brand or type of yarn as long as they are in the specified colors. The bead color can also vary depending on your preference. Let's move on to the crocheting process!
3. Crocheting the Charm
3.1 Creating the Slip Knot
To start, create a slip knot on your crochet hook. This knot will serve as the foundation for your project.
3.2 Making the Initial Chain
Next, begin chaining by making nine chains. This will be the starting point for your charm.
3.3 Single Crocheting the Rows
After making the initial chain, single crochet into the second loop from the hook. Continue single crocheting all the way back to the first chain, resulting in a total of eight single crochets. Remember to chain one and turn your work at the end of each row.
Continue single crocheting across each row from round one to round eight. Make sure to chain one and turn your work after each row. This will create a square shape for your charm.
3.4 Joining the Squares
Once you have two square pieces, align them together and work your way around. Identify the starting corner and stitch right next to it, ensuring that you have both squares on your hook. Use a slightly darker shade of blue yarn and slip stitch through, then chain one.
Continue working around the border of the squares as single crochets. When you reach the corners, put a half double crochet in one stitch and a double crochet increase (two double crochets in the same stitch) in the corner stitch. Make sure you are working through both squares.
3.5 Adding the Border
Continue single crocheting until you reach the tassels, ensuring that you fold them over to keep them out of the way. Finish off the border with a slip stitch into the first chain you made. This will complete the shape of the charm.
3.6 Creating the Tassels
Now it's time to create the tassels. Take your dark blue yarn and wrap it around your hand approximately five times. Cut the strands carefully off your hand.
Take a long piece of the blue yarn and tie a knot around the tassel. This will secure the strands together. You can adjust the length of the tassel based on your preference.
3.7 Attaching the Beads
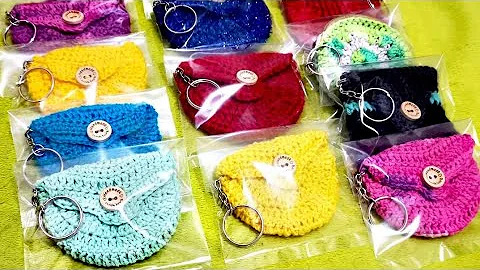
Thread the needle with a long strand of the blue yarn. Add a pony bead to the yarn, sliding it down to the bottom. Insert the needle through the front of the charm, defining the middle. Pull the needle all the way up, then go up and under the bead to secure it in place. Repeat this process three more times.
Split the tassel in half and pull the yarn under it. Go up through the bead again to ensure the tassel is secured. Finish off by tying a knot at the back and hide the remaining yarn strands inside the charm.
3.8 Finishing Touches
To complete the charm, cut a long strand of the dark blue yarn. Insert the needle through the middle of the top edge of the charm, leaving a tail to finish off. Thread the remaining pony beads onto the yarn, sliding them down to the bottom.
Go through the front of the charm and pull the needle up. Repeat this process three more times, going up and under the beads. Split the tassel in half and pull the yarn under it. Go through the front of the charm one last time, tie a knot at the back, and hide the remaining yarn.
4. Conclusion
Congratulations! You have successfully crocheted a shiny charm inspired by Pokemon. This charming accessory can be a great addition to your crochet collection or a thoughtful gift for any Pokemon lover. Don't forget to experiment with different colors and bead variations to make it truly unique.
Now that you have learned the basic steps, feel free to create more Pokemon-inspired charms using different designs and techniques. Crocheting is all about exploring your creativity and enjoying the process. So grab your crochet hook and start making beautiful creations today!
Highlights
- Learn how to crochet a shiny charm from Pokemon
- Detailed step-by-step instructions with accompanying visuals
- Customize the size and colors of your charm
- Perfect for keychains, bag charms, or room decorations
- Explore your creativity and make unique designs
- Suitable for beginners and experienced crocheters alike
FAQs
Q: Can I use different colors for the charm?\
A: Absolutely! Feel free to choose any colors that you prefer or are reminiscent of your favorite Pokemon.
Q: Can I make the charm larger or smaller than the given dimensions?\
A: Yes, you can adjust the size of the charm by changing the hook size and yarn thickness. Experiment and find the size that suits your preference.
Q: Are the materials easy to find?\
A: Most crafting stores carry crochet hooks, yarn, and beads. You can also find them online on websites like Etsy or Amazon.
Q: How long does it take to complete the charm?\
A: The time required depends on your crochet experience and speed. On average, it takes a couple of hours to complete the charm.
Q: Can I sell the charms I make using this tutorial?\
A: Yes, you can sell the charms you make. However, please respect copyright laws when selling Pokemon-related items.
Q: Where can I find a written version of this tutorial?\
A: A written version of this tutorial is available for purchase on the creator's Etsy shop and Ravelry. Links to these resources can be found in the video description.
 Beauty


 WHY YOU SHOULD CHOOSE BEAUTYBADY