Learn How to Crochet a Fun Toadstool Hat
Table of Contents
- Introduction
- Materials Needed
- Getting Started
- Making the Magic Circle
- Increasing the Stitches
- Continuing the Increase
- Reaching the Desired Width
- Non-Increase Rows
- Shaping the Hat
- Decreasing the Stitches
How to Make a Mario Bros-inspired George Still Hat
Are you a fan of the iconic Mario Bros game? Do you want to show off your love for the game by wearing a unique hat? Look no further! In this tutorial, we will guide you on how to create a Mario Bros-inspired George Still hat. This stylish hat can be customized with different colors, allowing you to represent your favorite character or theme. So, gather your materials and let's get started!
1. Introduction
The Mario Bros-inspired George Still hat is a fun and creative accessory that showcases your love for the famous video game. With its unique design, you'll stand out in a crowd and be the envy of fellow Mario enthusiasts. In this tutorial, we will provide step-by-step instructions on how to create this hat using crochet techniques.
2. Materials Needed
To create your own Mario Bros-inspired George Still hat, you will need the following materials:
- White yarn for the base of the hat
- Blue yarn for the spots (you can choose different colors depending on your desired theme)
- Crochet hook (size E)
- Yarn needle
- Scissors
- Safety pin
- Pins for marking spots
- Scrap of yarn
3. Getting Started
Before we dive into the actual crochet process, it's essential to familiarize yourself with the materials and gather them in one place. Once you have all your materials ready, you can proceed to the next step.
4. Making the Magic Circle
To begin creating our hat, we will start with a magic circle. Take the white yarn and loop it around your fingers twice. Pull a loop through the middle of those two loops using your crochet hook. Chain two, which will count as your first stitch. Then, chain five more times onto the magic loop to have a total of six stitches.
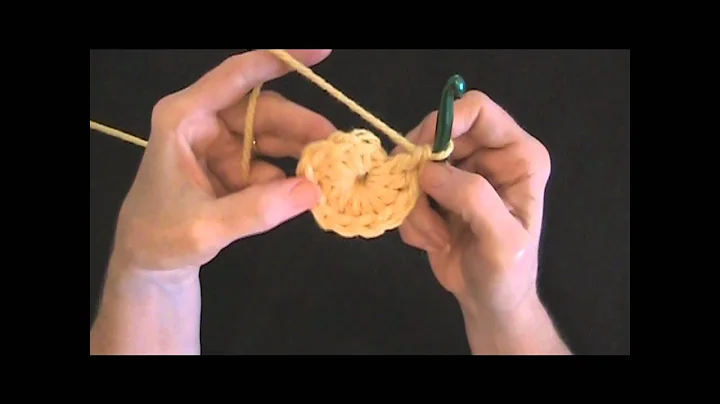
5. Increasing the Stitches
For this project, we will increase the number of stitches in each row to shape the hat. In the first row, we will increase in every stitch. Insert your hook into the first space, pull up a loop, and single crochet once. Repeat this step in the same space. Continue this increase pattern until you reach the beginning of the row, marking the first stitch with a safety pin.
6. Continuing the Increase
To maintain the shape of our hat, we will continue increasing the stitches in each subsequent row. Remove the safety pin and start the next row by increasing every other stitch. Single crochet once in the first stitch, replace the stitch marker, and increase in the next stitch. Repeat this pattern until you reach the beginning of the row.
7. Reaching the Desired Width
Continue following the pattern of increasing the stitches in each row. In each subsequent row, increase by one stitch more than the previous row. This gradual increase will help achieve the desired width for your hat. Remember to replace the stitch marker after each increase row.
8. Non-Increase Rows
Once your hat reaches the desired width, it's time to create a few non-increase rows to shape the crown of the hat. Single crochet in each stitch without increasing. This will create a bowl-like structure for the hat, ensuring a comfortable fit.
9. Shaping the Hat
After the non-increase rows, we will begin the decreasing process to shape the hat. From this point onward, crochet in both loops instead of just the back loops. Decrease the stitches in each row, following the pattern of the previous increase rows. This will gradually shape the hat into a more tapered form.
10. Decreasing the Stitches
Continue decreasing the stitches in each row until you reach the desired length of the hat. The number of rows to decrease depends on your preference and the size of the hat you want. Once you've achieved your desired length, finish off the hat by fastening off and sewing in any remaining yarn ends.
Congratulations! You have successfully created your very own Mario Bros-inspired George Still hat. Show off your unique style and love for the game by wearing this eye-catching accessory. Get ready to receive compliments and become a standout fan in any gathering.
Highlights
- Create a unique Mario Bros-inspired George Still hat to showcase your love for the game.
- Customize the hat with different colors and themes for a personalized touch.
- Step-by-step instructions guide you through the crochet process, making it suitable for beginners.
- Increase and decrease stitches to shape the hat according to your preference.
- Stand out in a crowd with this stylish and fun accessory.
FAQ
Q: Can I use different colors for the spots on the hat?
A: Absolutely! You can choose any color you like for the spots, depending on your desired theme or character representation.
Q: How long does it take to make this hat?
A: The time required to complete the hat may vary depending on your crochet speed and the complexity of the design. On average, it may take a few hours to complete.
Q: Can I customize the size of the hat?
A: Yes, you can customize the size of the hat by adjusting the number of increase and decrease rows. This allows you to create a hat that fits perfectly.
Q: Is this hat suitable for beginners?
A: Yes, this tutorial is beginner-friendly. It provides detailed step-by-step instructions to guide you through the entire crochet process.
Q: Can I make this hat for children or adults?
A: Absolutely! You can adjust the size of the hat based on the age or head circumference of the person you are making it for.


 WHY YOU SHOULD CHOOSE BEAUTYBADY