Master the Art of Crochet with this Herringbone Throw Blanket Tutorial
Table of Contents
- Introduction
- Choosing the Right Yarn for Your Blanket
- The Importance of Yarn Quality
- Benefits of Using Extra Fine Merino Yarn
- Tools Needed for the Project
- Crochet Hook Size and Material
- Determining the Size of Your Blanket
- Recommended Dimensions for Different Uses
- Adjusting the Size of the Blanket
- Understanding the Foundation Double Crochet Stitch
- Step-by-Step Instructions
- Tips for a Neat and Finished Edge
- Starting the Herringbone Pattern
- Introduction to the Herringbone Stitch
- How to Create the Diagonal Effect
- Continuing the Herringbone Pattern
- Repeating the Herringbone Stitch
- Achieving Consistency in the Pattern
- Completing the Blanket
- Counting Rows and Stitches
- Finishing Off and Weaving in Ends
- Adding Tassels for a Decorative Touch
- Planning the Placement of Tassels
- Creating and Attaching Tassels
- Adjusting the Length of Tassel Strands
- Conclusion
Learn How to Crochet a Cozy Blanket with Herringbone Stitch
Crocheting a blanket can be a fun and rewarding project, especially when you use the right materials and techniques. In this article, we will guide you through the process of crocheting a cozy blanket using the herringbone stitch. From selecting the perfect yarn to adding decorative tassels, we will cover everything you need to know to create your own beautiful blanket.
Choosing the Right Yarn for Your Blanket
One of the most important decisions you'll make when starting your crochet project is selecting the right yarn. The quality of the yarn affects not only the overall appearance of your blanket but also its durability and softness. For this particular project, we recommend using Sugarbush Yarns Chill, a 100% extra fine merino yarn. This high-quality merino yarn provides a luxurious feel and ensures that your blanket will be cozy and warm.
Tools Needed for the Project
To crochet your blanket, you will need a few essential tools. First and foremost, you'll need a crochet hook. For this project, we recommend using a 25mm crochet hook to create an extra thick and bulky blanket. Additionally, you'll need a pair of scissors to cut the yarn and a yarn needle to weave in the ends. Gathering all the necessary tools before you start will save you time and ensure a smooth crocheting process.
Determining the Size of Your Blanket
Before you begin crocheting, it is important to determine the size of your blanket. Depending on its intended use, you may want to adjust the dimensions accordingly. For example, a throw blanket for a twin-size bed or a chair may have different measurements than a king-size bed blanket. The dimensions of the blanket featured in this article are 46 inches by 28 inches, but we will also provide instructions for creating an extra-large size for a king-size bed.
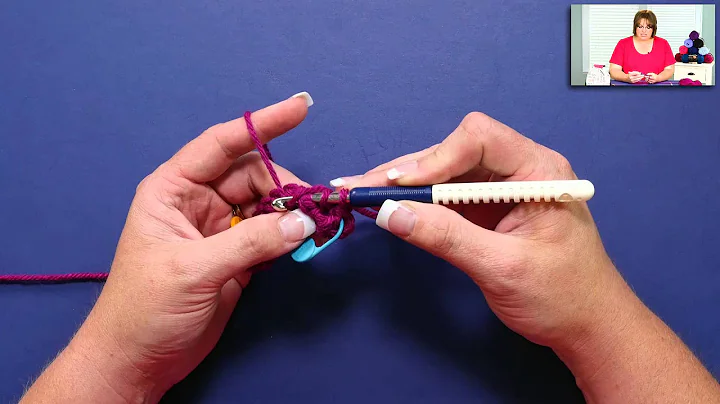
Understanding the Foundation Double Crochet Stitch
To ensure a neat and finished edge for your blanket, it is recommended to start with the foundation double crochet stitch. This stitch not only serves as a base for your project but also creates a professional-looking border. You will learn step-by-step instructions on how to perform the foundation double crochet stitch and useful tips to achieve a clean edge. Mastering this stitch will give your blanket a polished appearance.
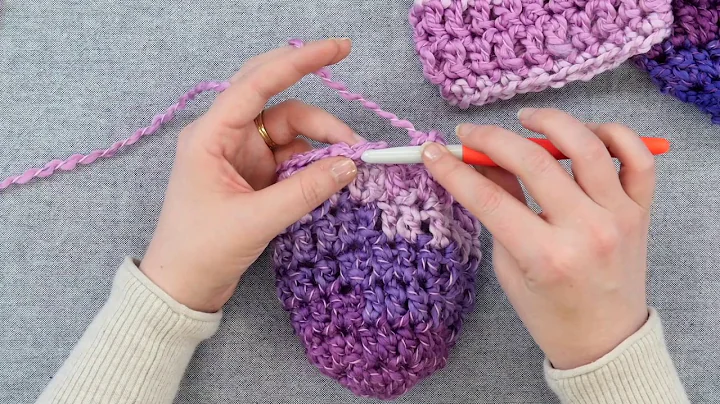
Starting the Herringbone Pattern
The herringbone stitch is known for its unique diagonal effect, which adds sophistication to your crochet projects. In this section, you will be introduced to the herringbone pattern and learn how to create the diagonal effect in your blanket. We will guide you through the steps, from the first stitch to working the herringbone pattern across the row. This stitch pattern will give your blanket a trendy and modern look.
Continuing the Herringbone Pattern
Once you have mastered the herringbone stitch, you will continue working the pattern across multiple rows. Consistency is key to achieving a uniform design, and we will provide tips and tricks to help you maintain a consistent stitch pattern throughout your blanket. By the end of this section, you will be familiar with the herringbone stitch and able to apply it effortlessly to your project.
Completing the Blanket
As you work your way through the rows, it is important to periodically count your stitches to ensure the correct number for each row. This section will guide you on how to count rows and stitches accurately, allowing you to keep track of your progress. Once you have completed the desired number of rows, we will show you how to finish off your blanket and neatly weave in the ends for a clean and professional finish.
Adding Tassels for a Decorative Touch
To add a decorative touch to your blanket, you can incorporate tassels along the edge. Tassels not only enhance the appearance of your project but also give it a personalized and trendy look. We will walk you through the steps of planning the placement of the tassels, creating the tassels themselves, and attaching them securely to the blanket. With the addition of tassels, your blanket will become a cozy and stylish accessory.
Conclusion
In conclusion, crocheting a cozy blanket using the herringbone stitch is a satisfying and enjoyable project. From selecting the right yarn to adding decorative tassels, we have covered all the essential steps to help you create a beautiful and personalized blanket. Whether you are a beginner or an experienced crocheter, this project will allow you to showcase your skills and create a cozy keepsake that can be cherished for years to come.
Highlights
- Learn how to crochet a cozy blanket using the herringbone stitch.
- Select the perfect yarn for a soft and luxurious finish.
- Get familiar with the tools needed for the project.
- Determine the ideal size of your blanket for its intended use.
- Master the foundation double crochet stitch for a finished edge.
- Create the herringbone pattern for a trendy and modern look.
- Maintain consistency in the stitch pattern throughout your blanket.
- Finish off your blanket and weave in the ends for a polished appearance.
- Add decorative tassels to personalize your blanket.
- Enjoy the process of creating a cozy and stylish accessory.
FAQ
Q: Can I use a different type of yarn for my blanket?
A: While we recommend using Sugarbush Yarns Chill for its quality and softness, you can certainly use a different yarn that meets your preferences. Just ensure that the yarn is suitable for the desired weight and provides the warmth and coziness you desire for your blanket.
Q: How long does it take to crochet a blanket using the herringbone stitch?
A: The time it takes to complete your blanket depends on various factors, such as the size of the blanket, your crocheting speed, and the amount of time you can dedicate to the project. Generally, crocheting a blanket of the dimensions mentioned in this article may take anywhere from a few days to a few weeks, depending on your skill level and availability.
Q: Can I modify the herringbone stitch pattern to create unique designs?
A: Absolutely! The herringbone stitch offers versatility and can be adapted to create different patterns and textures. Once you have mastered the basic herringbone stitch, feel free to experiment with variations and incorporate your own creative touches to make your blanket truly one-of-a-kind.
Q: How do I care for my crocheted blanket?
A: To keep your crocheted blanket looking its best, it is recommended to follow the care instructions specific to the yarn you have used. Generally, gentle handwashing in cool water and laying flat to dry is suitable for most yarns. Avoid using harsh detergents or machine washing and drying, as this can cause damage to the fibers and alter the shape of your blanket.
Q: Can I make a smaller or larger blanket than the dimensions mentioned?
A: Yes, you can adjust the dimensions of your blanket to fit your desired size. The instructions provided in this article serve as guidelines for creating a specific size, but you can easily modify them by adding or subtracting stitches and rows. Just ensure that you maintain a consistent tension throughout your project for a balanced and professional finish.
Q: Can I sell the blankets I make using this pattern?
A: Yes, you can sell the blankets you make using this pattern. However, please note that the pattern itself is protected by copyright and should not be reproduced or distributed without permission. It is always a good practice to give credit to the original designer or provide a link to the pattern source when selling your finished blankets.
 Beauty


 WHY YOU SHOULD CHOOSE BEAUTYBADY