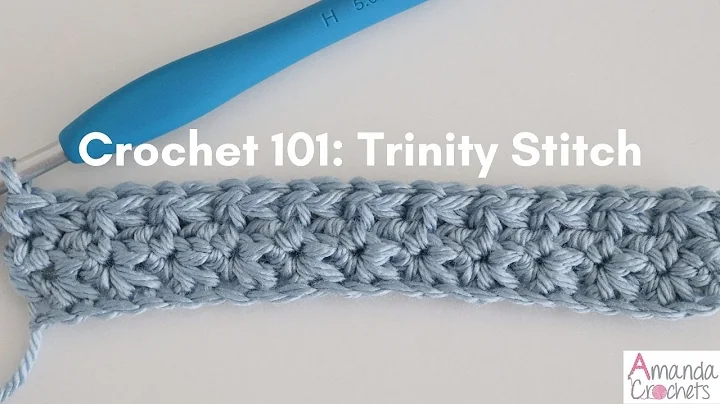
Master the Art of Crocheting a Chic Slouchy Hat
Table of Contents
- Introduction
- Materials Needed
- Step 1: Making the Loop Stitch
- 3.1 Chaining the First Row
- 3.2 Slip Stitching and Chaining in Following Rows
- 3.3 Continuing until Headband Portion is Long Enough
- Step 2: Sewing the Beginning and End
- Step 3: Single Crocheting the Entire Row
- Step 4: Creating the Braided Look
- 6.1 Chain 3 and Double Crochet for the Entire Row
- 6.2 Slip Stitching and Creating the Cable Stitch Pattern
- Step 5: Continuing the Cable Stitch Pattern
- Step 6: Decreasing the Stitches
- 8.1 Decreasing on the Edge Stitch
- 8.2 Continuing the Decrease every Other Stitch
- Step 7: Final Decrease Rounds
- Finishing Touches
- Conclusion
How to Crochet a Braided Cable Headband: Step-by-Step Guide
Crocheting headbands is a fun and creative way to accessorize while keeping warm during the colder months. In this step-by-step guide, we will learn how to crochet a braided cable headband using the loop stitch technique. The resulting headband will be cozy, stylish, and perfect for keeping your ears warm.
Step 1: Making the Loop Stitch
To start, gather your materials: a crochet hook, yarn in your preferred color, and a pair of scissors. The loop stitch creates a textured look reminiscent of a cable knit pattern. We will begin by chaining ten stitches and then slip stitching to create a loop.
3.1 Chaining the First Row
The first row involves chaining ten stitches to create the foundation for our headband. Make sure to keep the tension loose to allow for easier stitching in the following steps.
3.2 Slip Stitching and Chaining in Following Rows
In the following rows, we will slip stitch in the first stitch, chain one, and turn our work to begin the next row. This allows us to create the loop stitch pattern. Repeat this step until the headband portion is long enough to comfortably fit around your head.
3.3 Continuing until Headband Portion is Long Enough
Continue slip stitching in the back portion of the stitch and chaining one to turn your work for each subsequent row. Repeat these steps until the headband portion is long enough to comfortably fit around your head.
Step 2: Sewing the Beginning and End
Once you have crocheted a long enough headband portion, it's time to sew the beginning and end together. To do this, go through the first stitch and pull your working stitch through, creating a loop. Chain one and slip stitch into the loop stitch. Repeat this process until the beginning and end are securely sewn together.
Step 3: Single Crocheting the Entire Row
After sewing the beginning and end, turn the headband to the right side. Chain one and single crochet into each of the openings along the edge of the headband. This will create a neat and finished look for the edge.
Step 4: Creating the Braided Look
To create the braided cable look, we will be using a combination of double crochet stitches and a slip stitch cable stitch pattern.
6.1 Chain 3 and Double Crochet for the Entire Row
Start by chaining three, then double crochet in each stitch for the entire row. This creates the foundation for the cable stitch pattern.
6.2 Slip Stitching and Creating the Cable Stitch Pattern
To create the cable stitch pattern, we will be slip stitching and crossing stitches. Follow the pattern instructions carefully to achieve the desired braided effect.
Step 5: Continuing the Cable Stitch Pattern
Continue alternating between rows of double crochet stitches and cable stitch patterns to create the braided cable look. Repeat this pattern until you reach the desired length of your headband, ensuring each row complements the previous one.
Step 6: Decreasing the Stitches
To shape the headband and make it snugger around the head, we will need to decrease the number of stitches gradually.
8.1 Decreasing on the Edge Stitch
Start by chaining three and then decreasing on the edge stitch for each row. This will create a tapered end for the headband.
8.2 Continuing the Decrease every Other Stitch
Continue decreasing on every other stitch in the subsequent rows until you reach the desired width of your headband. This will ensure a snug fit and prevent the headband from slipping off.
Step 7: Final Decrease Rounds
In the final decrease rounds, decrease on every stitch to close the end of the headband. This will create a finished and seamless look.
Finishing Touches
To complete the headband, fasten off the yarn, turn the work inside out, and secure the stitches. Cut the yarn, leaving a long tail, and weave it through the stitches to secure them. Trim any excess yarn and hide the ends inside the headband to give it a clean finish.
Conclusion
Crocheting a braided cable headband is a rewarding and enjoyable project. The loop stitch technique and cable stitch pattern create a beautiful and textured design. Whether you're a beginner or an experienced crocheter, this headband will make a stylish and cozy accessory. Grab your crochet hook and yarn, and start creating your own braided cable headband today.
Highlights:
- Learn how to crochet a braided cable headband step-by-step
- Use the loop stitch technique for a textured look
- Create a braided cable pattern using double crochet and slip stitches
- Decrease stitches for a snug fit
- Finish by sewing the beginning and end together
- Perfect for keeping your ears warm during the colder months
FAQ
Q: Can I use a different stitch pattern for the headband?
A: Yes, you can experiment with different stitch patterns to create a unique look for your headband. However, the braided cable stitch pattern adds a beautiful texture to the headband.
Q: Can I adjust the size of the headband?
A: Yes, you can adjust the size of the headband by chaining more or fewer stitches at the beginning. Additionally, you can increase or decrease the number of rows to customize the width.
Q: Is this headband suitable for beginners?
A: This headband project is suitable for beginners who have basic knowledge of crochet stitches. The step-by-step instructions provided in this guide will help you create your own braided cable headband with ease.
Q: What type of yarn should I use for the headband?
A: You can use any type of yarn that is suitable for the desired warmth and look of the headband. Choose a yarn that is comfortable to wear and matches your personal style.
Q: Can I personalize the headband with embellishments?
A: Absolutely! You can add embellishments such as buttons, flowers, or bows to personalize your headband. Get creative and make it uniquely yours.
Q: How long does it take to crochet a braided cable headband?
A: The time required to crochet a braided cable headband depends on your crocheting speed and experience. On average, it can take a few hours or spread over a couple of days.
Q: Can I gift this headband to someone?
A: Yes, this headband makes a thoughtful and handmade gift for family and friends. Personalize it with their favorite color and style to make it extra special.
Q: How do I take care of the crocheted headband?
A: To care for your crocheted headband, it's best to hand wash it gently using mild detergent and lukewarm water. Allow it to air dry flat to retain its shape.
Q: Can I make a matching set with a scarf or gloves?
A: Definitely! You can make a matching set by using the same stitch pattern and yarn to crochet a scarf or gloves. This will create a coordinated and stylish winter accessory set.
 Beauty


 WHY YOU SHOULD CHOOSE BEAUTYBADY