Master the Mini Bean Stitch with Crochet Expert
Table of Contents
- Introduction
- Materials Needed
- Getting Started
- Making a Slipknot
- Creating the Foundation Chain
- The Elizabeth Stitch
- Row 1
- Row 2
- Subsequent Rows
- Working with the Spaces
- Identifying the Correct Space
- Completing the Stitch in Each Space
- The Rhythmic Nature of the Stitch
- Making an Elizabeth Stitch Infinity Scarf
- Link to Free Pattern
- Tips for Creating the Scarf
- Final Thoughts
- FAQ
How to Make the Elizabeth Stitch: A Step-by-Step Tutorial
Crocheting is a wonderful skill that allows you to create beautiful and intricate patterns with just a hook and some yarn. In this tutorial, I will guide you through the process of making the Elizabeth stitch, a textured stitch that looks complex but is actually quite simple to master.
1. Introduction
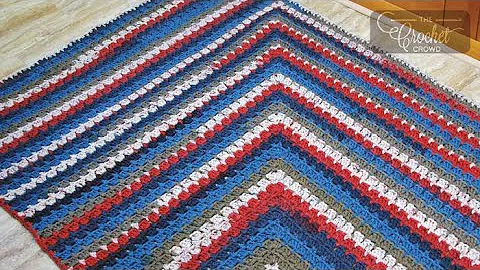
The Elizabeth stitch, also known as the mini bean stitch, is a versatile stitch that can be used to create a variety of projects, including scarves, cowls, and blankets. Its unique texture adds depth and visual interest to your crochet creations.
2. Materials Needed
To make the Elizabeth stitch, you will need the following materials:
- Yarn: Choose a chunky weight yarn for a cozy and textured result.
- Crochet Hook: The appropriate hook size will depend on the yarn weight you choose. Refer to the yarn label for guidance.
- Darning Needle: Used to weave in any loose ends.
- Scissors: Essential for trimming excess yarn as you go.
3. Getting Started
Before we dive into the Elizabeth stitch, let's gather our materials and get ready to crochet. Make sure you have your yarn, crochet hook, darning needle, and scissors within reach.
3.1 Making a Slipknot
To begin, create a slipknot by forming a loop with your working yarn. Insert your crochet hook through the loop and tighten the knot. This will serve as the first stitch of your project.
3.2 Creating the Foundation Chain
The Elizabeth stitch is worked over two stitches, so we will start by chaining multiples of two. For example, if you want to create a project with 13 stitches, you would chain a total of 13 + 3 = 16.
4. The Elizabeth Stitch
4.1 Row 1
To start row 1, insert your hook into the third chain from the hook. Yarn over and pull up a loop, then yarn over again and insert the hook back into the same chain space. Yarn over and pull up another loop. Repeat this process for the next chain, always inserting the hook under the first loop of the chain. Finally, yarn over and pull through all four loops on the hook, then chain 1 to complete the first Elizabeth stitch. Continue this pattern until you reach the end of the row.
4.2 Row 2
Now that we have completed the first row, it's time to move on to row 2. Create a chain 2 as your turning chain. When starting row 2, be careful to insert your hook into the space between the starting chain and the first Elizabeth stitch. Work the Elizabeth stitch as before, making sure to yarn over and pull through all four loops on the hook. Chain 1 to complete the stitch. Repeat this process for each space between the rest of the stitches in row 2.
4.3 Subsequent Rows
For the following rows, continue to create a chain 2 as your turning chain. Always work into the spaces between the stitches from the previous row, ensuring you have four loops on the hook before pulling through. Chain 1 to complete the stitch. Repeat this pattern for each subsequent row, and you will see the beautiful texture of the Elizabeth stitch start to emerge.
5. Working with the Spaces
A key aspect of creating the Elizabeth stitch is knowing where to work into the correct spaces. Let's explore this in more detail.
5.1 Identifying the Correct Space
When starting a new row, you need to work into the space between the chain two (turning chain) and the first Elizabeth stitch from the previous row. This ensures that the stitches align properly and create an even and attractive pattern.
5.2 Completing the Stitch in Each Space
To complete the Elizabeth stitch in each space, insert your hook, yarn over, and pull up a loop. Yarn over again, insert the hook back into the same space, and pull up another loop. Yarn over once more and pull through all four loops on the hook. Finally, chain 1 to finish the stitch. Repeat this process for each space in the row, always making sure to have four loops on the hook before pulling through.
6. The Rhythmic Nature of the Stitch
The Elizabeth stitch has a rhythmic quality to it that makes it both enjoyable to create and easy to get into a flow. As you become more familiar with the stitch, you will find that your hands naturally move in a smooth and steady motion, making the crocheting process even more relaxing and enjoyable.
7. Making an Elizabeth Stitch Infinity Scarf
One popular project using the Elizabeth stitch is an infinity scarf. The texture of the stitch creates a cozy and warm fabric that is perfect for wrapping around your neck on cold days. Here are a few tips to keep in mind when making the scarf:
7.1 Link to Free Pattern
I have created a free pattern for an Elizabeth stitch infinity scarf, which you can find on my blog. The pattern includes detailed instructions and a stitch count to help you create a beautifully finished scarf.
7.2 Tips for Creating the Scarf
When making the scarf, consider the yarn and hook size. Chunky yarn works well with the Elizabeth stitch, but you can experiment with different weights to achieve different textures. Remember to gauge the tension and adjust your hook size if necessary to ensure the scarf turns out the way you envision it.
8. Final Thoughts
The Elizabeth stitch is a versatile and visually appealing stitch that adds depth and texture to your crochet projects. With a bit of practice, you can create stunning pieces that are sure to impress. Whether you choose to make an infinity scarf, a cozy blanket, or any other project, I hope you enjoy exploring the possibilities of the Elizabeth stitch.
9. FAQ
Q: How difficult is the Elizabeth stitch for beginners?
A: The Elizabeth stitch may seem complex at first, but with some practice, even beginners can master it. Start with smaller projects, such as a coaster or dishcloth, before moving on to larger items.
Q: Can I use different yarn weights for the Elizabeth stitch?
A: Yes, you can experiment with different yarn weights to achieve different textures and results. Just make sure to adjust your hook size accordingly.
Q: Are there video tutorials available for the Elizabeth stitch?
A: Yes, there are many video tutorials online that demonstrate the step-by-step process of creating the Elizabeth stitch. Watching these tutorials can be helpful in understanding the stitch visually.
Q: Can I incorporate other stitches with the Elizabeth stitch?
A: Absolutely! The Elizabeth stitch pairs well with other stitches, such as single crochet or half double crochet. Feel free to combine different stitches to create unique and interesting patterns.
Q: How do I count the number of stitches in each row?
A: Counting your stitches can be challenging with the Elizabeth stitch due to its textured nature. It's best to count the number of spaces between the stitches rather than the stitches themselves.
 Beauty


 WHY YOU SHOULD CHOOSE BEAUTYBADY