Unleash Your Creativity: Crochet Your Favorite Pokémon!
Table of Contents:
- Introduction
- Gathering Supplies
- Creating the Feet
- Making the Rectangular Body
- Decreasing for a Curved Back
- Adding the Bulb
- Crocheting the Leaves
- Creating the Spiky Ears
- Embroidering Leafy Patches
- Assembling the Pieces
- Adding Final Details
Article: How to Crochet a Bulbasaur Amigurumi
Crocheting amigurumi toys is a fun and creative way to bring your favorite characters to life. In this tutorial, we will guide you through the process of crocheting a Bulbasaur amigurumi, step by step. From gathering supplies to adding the final details, you'll learn everything you need to know to create your very own Bulbasaur. So grab your crochet hooks and let's get started!
1. Introduction
Amigurumi is a Japanese art form that involves crocheting or knitting small stuffed toys. These adorable creations are often made by crocheting in the round to create a seamless and three-dimensional shape. In this tutorial, we will focus on crocheting a Bulbasaur, a popular Pokémon character known for its plant-like appearance and unique abilities.
2. Gathering Supplies
Before we begin, it's essential to gather all the necessary supplies. You will need:
- Yarn in green, white, and any other colors you'd like to use for additional details
- Crochet hooks in various sizes (depending on your yarn thickness)
- Safety eyes or buttons for the Bulbasaur's eyes
- Fiberfill or stuffing material for the toy's body
- Yarn needle for sewing and embroidering details
- Scissors for cutting yarn
Make sure you have all these supplies ready before starting the project.
3. Creating the Feet
We will start crocheting our Bulbasaur amigurumi from the feet. The feet are made by double crocheting six stitches into a magic ring and then increasing six times on each round. After completing the feet, sew them together to create a curved shape.
4. Making the Rectangular Body
Once the feet are done, it's time to crochet the rectangular body of our Bulbasaur. By picking up stitches from the feet, you can eliminate the need to crochet them separately. Double crochet straight for several rounds to create a rectangle shape.
5. Decreasing for a Curved Back
To give the Bulbasaur's back a nice curve, we will gradually decrease the number of stitches. This will create a more realistic shape and capture the essence of the character. Follow the pattern instructions for decreasing and continue crocheting until the desired shape is achieved.
6. Adding the Bulb
The Bulbasaur's most recognizable feature is the bulb on its back. Crochet a sphere shape by double crocheting six stitches into a magic ring and then double crocheting straight for a few rounds. Stuff the bulb with fiberfill or any desired stuffing material before closing it up.
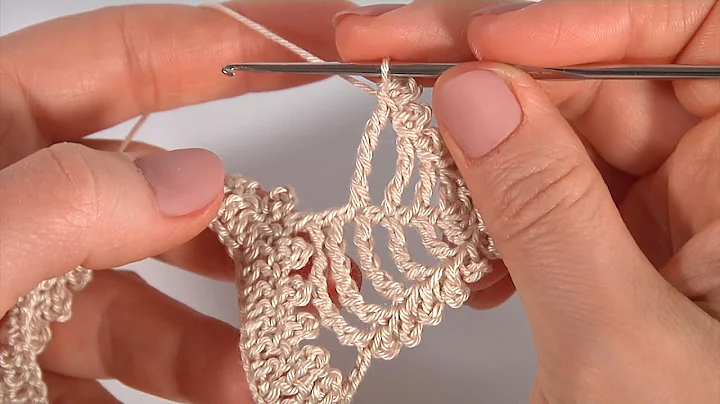
7. Crocheting the Leaves
The Bulbasaur has leafy patches all over its body. Crochet leaves to go around the edges of the bulb and other areas you want to add detail to. Start with a slip knot and chain eight to create a foundation. Double crochet in every stitch, increasing at the ends to create a curved shape. Continue crocheting straight for a few rows to add length to the leaf.
8. Creating the Spiky Ears
Crochet spiky ears to complete the Bulbasaur's head. Follow the pattern instructions to create the ears, making sure to use the correct colors. It is important to pay attention to details to accurately represent the character.
9. Embroidering Leafy Patches
Use a yarn needle to embroider leafy patches on the Bulbasaur's body. Refer to reference images or patterns to guide you in the placement and shape of the leafy patches. This step adds depth and brings the character to life.
10. Assembling the Pieces
Now that all the individual pieces are complete, it's time to assemble our Bulbasaur amigurumi. Attach the head, bulb, ears, and leaves to the body using a yarn needle and matching yarn. Make sure to align and securely attach all the pieces to form the complete character.
11. Adding Final Details
To add the final details, embroider facial features such as eyes, nose, and mouth using a yarn needle and contrasting yarn color. Take your time and make sure the features are accurately represented. Allow your creativity to shine through in this step.
Creating a Bulbasaur amigurumi is a rewarding project that allows you to showcase your crochet skills while bringing a beloved character to life. Whether you're a beginner or an experienced crocheter, following these step-by-step instructions will help you create a unique and adorable Bulbasaur toy that you can cherish or gift to a Pokémon enthusiast. So grab your yarn and crochet hooks, and let your creativity soar as you embark on this fun and exciting crochet adventure!
 Beauty


 WHY YOU SHOULD CHOOSE BEAUTYBADY