Easy Easter Crochet Tutorial
Table of Contents
- Introduction
- Materials Needed
- Bunny Number 1: Small Bunny Tutorial
- Body
- Head
- Ears
- Bunny Number 2: Big Bunny Tutorial
- Body
- Head
- Ears
- Making the Pom-Pom Tail
- Attaching the Features
- Conclusion
Introduction
Welcome back to the Herbarthiquerie! In this Easter tutorial, we will be making adorable little bunnies using leftover yarn scraps. These cute bunnies are perfect for decoration or as gifts. We will provide step-by-step instructions for two versions of the bunny, one small and one slightly bigger. Additionally, we will show you how to make a fluffy pom-pom tail to complete the bunny's look. So let's dive in and get crafting!
Materials Needed
Before we begin, make sure you have the following materials:
- Worsted weight yarn
- Crochet hook (4mm for small bunny, size may vary for bigger bunny)
- Scissors
- Yarn needle
- Hot glue gun (optional)
- Googly eyes or embroidery thread for eyes
- Thread for attaching features (if not using hot glue)
Now that we have everything ready, let's start making our adorable Easter bunnies!
Bunny Number 1: Small Bunny Tutorial
Body
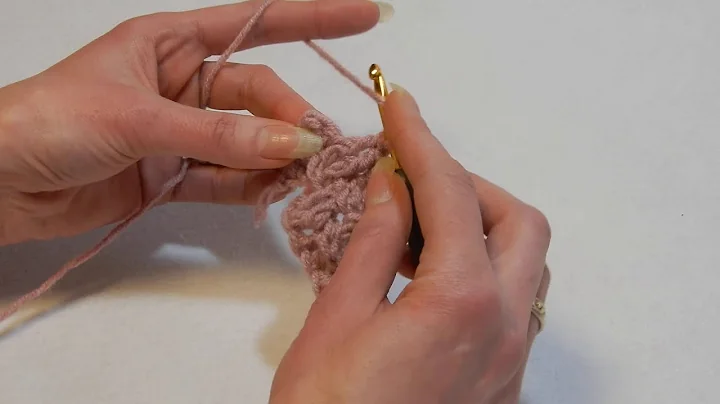
To start, create a slip knot on your crochet hook and chain four. Then, slip stitch to the first chain to create a ring. Chain three, which will count as your first double crochet, and make a double crochet in the same ring. Continue making double crochets until you have a total of 13 double crochets, including the chain three. Slip stitch to the top of the first chain three to complete the body.
Head
For the head, slip stitch into the next stitch, chain one, and make two half doubles in the same space. In the next stitch, make three double crochets. Now it's time to create the bunny's ears. Chain eight, slip stitch into the top of the last double crochet made, chain eight again, and slip stitch back into the same hole. Snip the yarn, secure with a chain one, and sew in the ends.
You can either sew on the tail at this point or attach it later using a hot glue gun along with the googly eye. For a smaller bunny, trim the larger pom-pom before attaching it.
Bunny Number 2: Big Bunny Tutorial
Body
Similar to the small bunny, create a slip knot on your crochet hook and chain four. Slip stitch to the first chain to form a ring. Chain one and make eight single crochets into the ring. Slip stitch to the top of the first single crochet to complete the foundation ring. Next, we'll be doing double crochets together. Chain three, which counts as the first double crochet, and double crochet in the same stitch. Repeat this process three times more, then finish with a slip stitch to the top of the first cluster.
Head
Continue with a chain two and two double crochets in the same space. In the following space, work three treble crochets. Repeat this process three times. Finish with a double crochet in the final space to complete the head. To create the ears, chain six, slip stitch, single crochet, and make two half doubles in the next stitch. Slip stitch into the fifth chain, then slip stitch back into the top of the last double crochet to attach it to the head. Repeat this process for the second ear.
Making the Pom-Pom Tail
For a fluffy pom-pom tail, use a fork or your hand as a tool. Wrap the yarn around the fork or your hand until you achieve the desired fluffiness. Tie the yarn tightly around the center and cut the loops on each side. Trim the pom-pom until it is nice and round.
Attaching the Features
Once you have your pom-pom tail, attach it to the bunny using the leftover strands or hot glue. You can also glue on the googly eyes using a hot glue gun or embroider the eyes with colored thread. Be sure to secure all the ends and give your bunny a trim if needed.
Conclusion
And there you have it! You have successfully created cute little bunnies using your leftover yarn scraps. These bunnies make great Easter decorations or gifts. We hope you enjoyed this tutorial and give it a try. Don't forget to hit like and subscribe to our channel to show your support. If you have any questions or suggestions for future Easter projects, feel free to comment down below. Happy crafting!
Highlights
- Create adorable Easter bunnies using leftover yarn scraps
- Step-by-step instructions for two sizes of bunnies
- Making a fluffy pom-pom tail to complete the bunny's look
- Options for attaching features using a hot glue gun or sewing
- Perfect for Easter decorations or gifts
FAQ
Q: Can I use different yarn weights for the bunnies?
A: While the tutorial uses worsted weight yarn, you can experiment with different weights to achieve different sizes and textures for your bunnies.
Q: How long does it take to make these bunnies?
A: The time required depends on your crochet skills and the size of the bunny. Generally, it can take a couple of hours to complete one bunny.
Q: Can I customize the features of the bunny?
A: Absolutely! Feel free to add additional features such as a stitched nose or a bowtie to personalize your bunny creations. Use your creativity and make them unique.


 WHY YOU SHOULD CHOOSE BEAUTYBADY